The main purpose of your holiday rental website is to inform potential guests and encourage them to make a booking.
In order to do that, you need to make it as informative, engaging and enticing as possible.
But how do you go about doing that?
One visual way, which has the benefit of being informative, engaging and enticing, is to embed an interactive travel map on your website.
This allows you to display your property’s location against nearby attractions, the best restaurants and bars, and anything else you think is relevant to your potential guests. And photos can even be added for greater engagement.
With the places to see already plotted, directions are just a click away. Making it even easier for your potential guests to get an idea of where the property is in relation to everything else.
So here’s how you can add an interactive travel map to your holiday let website …
1. Make sure you’re logged into your Google account. If you don’t have an account, you can create one here.
2. Once logged in, go to Google My Maps.
3. Click the CREATE A NEW MAP button to get started
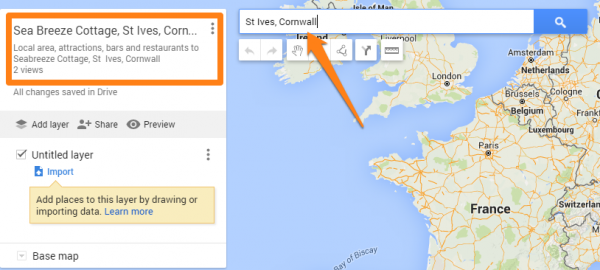
4. Enter a map title and description along with adding the location to the search field:
5. Now you’re ready to start pinpointing attractions.
NB: There may be a tendancy to want to go overboard, particularly if your holiday rental is in a location with an abundance of things to do.
But remember, this is your ‘sales’ site.
So only include information that will entice those visitors to make an enquiry. Don’t overwhelm them.
Think of the top attractions for your primary audience.
For example, if you’re targeting families, include the best options for kids, and kid-friendly restaurants.
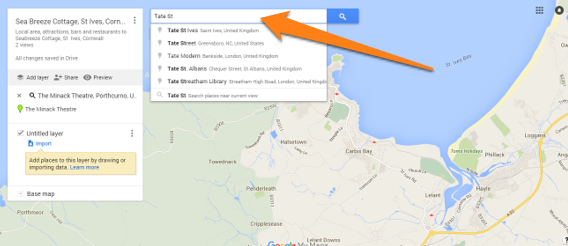
6. Start by typing the name of the first attraction into the search field provided. Once you start typing, suggestions will appear.
Select yours from the list, or continue typing until it is the only result.
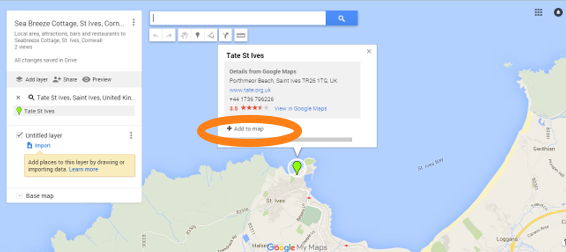
Then click Add to map for it to be added to your map.
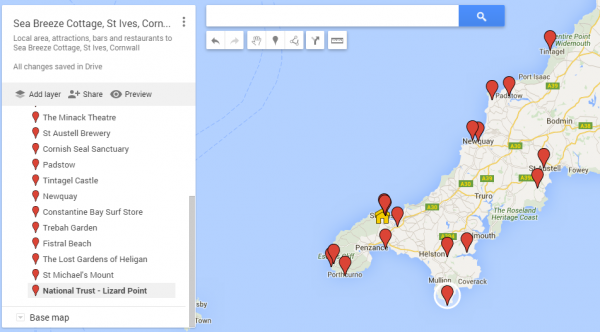
7. Repeat this process for all the attractions, restaurants, local amenities, etc. you want your map to display.
Until eventually your map will have lots of attractions pin pointed.
8. Now comes the fun part – making it clear what each pinpoint is.
So rather than have them all the same colour and icon, why not customise each one to be relevant to that point of interest, presenting it in more obviously.
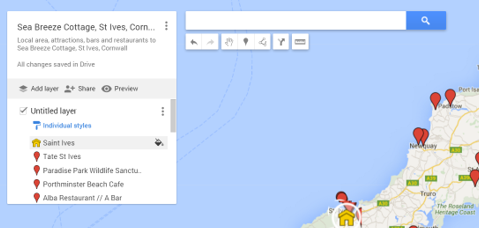
Start with your own property and make sure it stands out from all the attractions, so your website visitors get a better understanding of the distances.
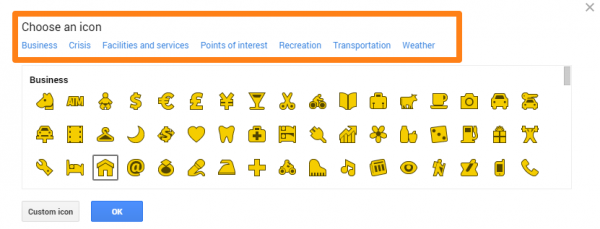
Hover over your property until a paint pot icon appears and then click it:
Now you can either choose a colour for better stand out or an icon to represent your property – for example, here we chose a house.
When opting for icons for the rest of your pinpoints, there are plenty of categories to select from. So take a few minutes to find the most suitable icon before saving.
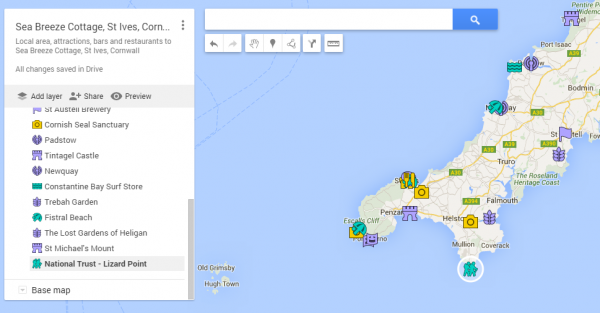
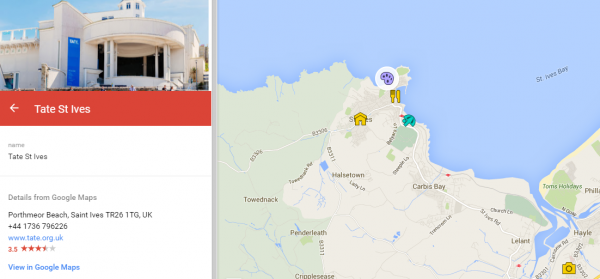
9. Once you’ve done that for all your points of interest, the different types of attractions will be more obvious to your website visitors.
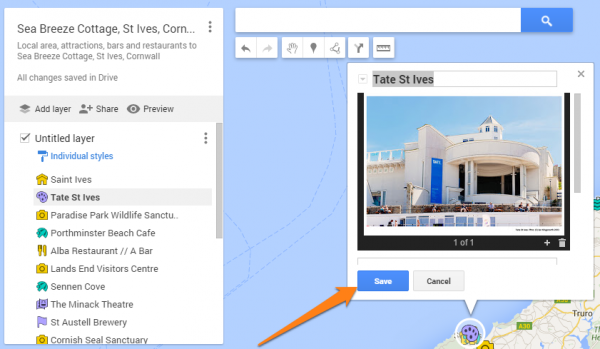
And remember we mentioned being able to embed photos too?
What better way to showcase your local area than by including quality photos of attraction on your interative map.
To do this, simply click on the attraction you want to display a photo, select the camera icon and either enter the URL of the photo or do a Google search, and save one.
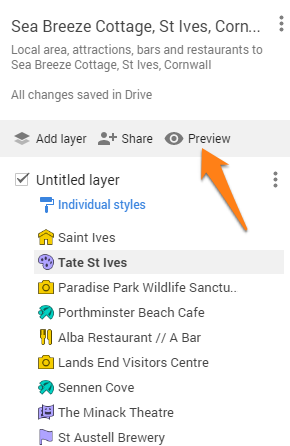
10. When you’re finished, click the Preview button to show how your map will display to your website visitors, and have a play around. Zoom in and click on each icon. Anything you’re not happy with, just go back and change it.
But of course that’s not all.
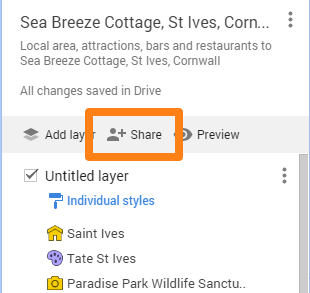
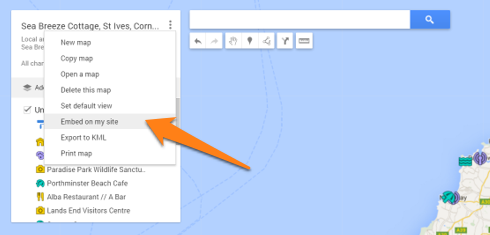
11. Now you’ve got your map setup, you need to embed it on your website.
First, you need to ensure your map is public. Do this by clicking the Share button and selecting Public on the web
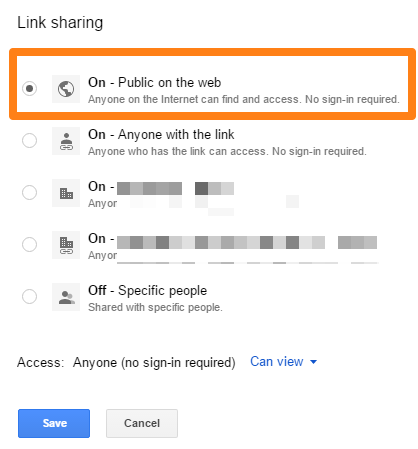
Once public sharing is saved, head up to the menu icon and select Embed on my site
Copy the code that appears in the pop up box, go to your website, find the page that you want the map displayed on and simply paste the code.
Of course how you do this final stage will depend on the content management system you’re using. For example, with PromoteMyPlace websites, you can easily embed 3rd party code using the Insert HTML Snippet functionality.
Once the code has been embedded, preview your website to see how it looks.
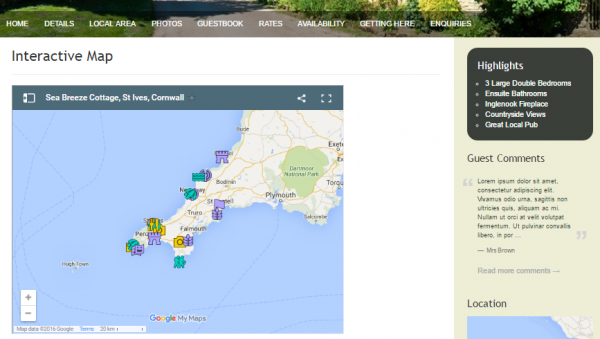
Providing information in this way will give your website visitors real value, and have the added benefit of making you stand out from the competition.
Enjoy!
Thanks for this most helpful guide. Have found it easy to follow, and enjoyed making my map.
You’re welcome. Glad to hear you enjoyed it. I’m sure your website visitors and guests will find your map useful.